Permissions in VIA® are Roles in VIA® can be used to define control what users a user can see and what they can 't do within each Board. Each Board has their own members and own permission settings. There are two default Roles built into VIA® which are the Admin and User roles. An Admin of a Board as all permissions available to themselves. Users will only have permission to view and edit Cards. They will have no ability to modify other properties within the Board. If you want some Users to have more permissions, but not all permissions, you can create your own Role and assign the User that role. You can follow the guides below if you want step-by-step guides on how to add and edit permissions of Users.
Setting a Users Permissions
Follow this guide if you want to change a users permissions.
Go to a BoardOn the Sidebar click on the Users Avatar.
Click on "Change Permissions...". (What is in the parenthesis is what their current permission settings are)
Choose the Role that you would like them to have.
| Tip |
|---|
View the Adding Custom Roles if you need to make your own permissions. |
The user will now have the Role that you selected.
Creating Custom User Roles
Follow this guide if you want to add a custom user role.
| Info |
|---|
You must be a VIA® Admin to create custom User roles. |

Click on Roles.
Fill out the Name and Description fields.

Click the Save Icon
Select the Permissions that you would like to give this Role.
do within the system. Roles are defined in the administration screen and assigned to user accounts, groups and boards. The following instructions will walk your through managing roles and assigning them to different areas of the system.
| Panel |
|---|
Managing RolesTo add, edit or remove a role you will need to access the administration section of VIA®. Login to VIA® and click on the menu next to your name to display the user menu. You should see an Admin option. If you do not have this option your user account is not setup as an administrator; contact your system administrator to make changes to your account in order to access this section of VIA®.
|


| Panel | ||
|---|---|---|
Assigning Roles Throughout VIA®Follow this guide to assign roles throughout VIA®.
Assigning Roles to UsersEach user in VIA® will have roles assigned to them. These roles will determine what users can do in the system such as attach files to cards or move cards between lists. Assigning a role to a user is done when the user is created. You can edit a role by opening up the admin menu (click on your name on the top right side of the VIA® screen and choose admin) and then selecting users in the admin menu that runs on the left side of the screen. On the main screen locate the user you want to edit and click on the edit button
There are two fields on the user screen related to the Roles. The first is the permission role. This field will define the rights that the user has in every section of the system other than the administration screen. The second field titles Admin Permissions Role will set the administration rights for the user. The fields have been separated so that you can assign the admin rights separately from the regular user roles. NOTE when you first create a user they will have None listed as the roles. This means that they will be assigned the Global role. To change the role a user has been assigned click on the field and a drop down list will appear with all options for role selection. Assigning Roles to Groups/BoardThe roles that you assign to a user in their user profile will flow to all areas of the system; however, you can override a users role from within specific groups and on boards. To learn how to create a group see the link for creating groups in this documentation. At the bottom of each group configuration screen there is a section where you can define a role
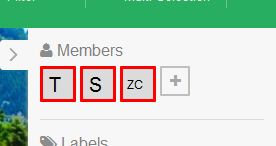
In the above example, the users will have access to the carrier role on the Billing Customer's board. If they had different rights assigned the the user this Carrier role will override them for this specific board. Utilizing groups can allow you to assign multiple users to a number of boards and assign a specific role to each of these users on the boards defined in the group screen. If you choose to manually add users to groups you can also alter this role setting on a user by user basis per board. To see how this works login to VIA® and open a board that you want to either assign a user to or alter an existing users permission. Open the slide out menu on the right side of the screen and select the members menu item
You can use the + to search for and add new members if the user you want to edit is not already a member of the board. Once you have your member on the board you can left click on the square that represents the user to bring up a menu listing.
By default, the user will have none selected for the permissions which means that they will carry the same role in this board as the role they have assigned to them in the user administration screen. If you would like the user to have a different role for this specific board you can assign that in this section. Click on the change permission option and you will see a listing of all the roles in the system. Choose the role you want to assign the user. |


